Showing posts with label beginner tips. Show all posts

Thursday, March 20, 2014

Pruning 101

When you have a nice Saturday afternoon, you may, like me, have the itch to get out and plant flowers, vegetables, and more. Unfortunately, it's still too early to plant tomatoes, petunias, and those other heat-loving plants we all love, but it's the perfect time to get out and prune.

There is a right way and a wrong way to prune. I see so many beautiful trees and shrubs ruined by bad pruning--even pruning done by well-meaning "landscape" companies! Good pruning makes your trees and shrubs both more beautiful and more healthy in the long term. It may take a little longer, but it doesn't have to be complicated. The reward is worth it. I'll show you how!

First: The Tools
I have three tools I use for all my pruning. I could probably use a couple more, but these three serve me just fine 95% of the time.

My favorite pruning tools, from left to right: bypass hand
pruners, loppers, and folding saw

Most of the time, I use hand pruners (Felco 2, to be exact) to cut small branches. For larger branches, or branches slightly out of reach, I use loppers. Because I have some older trees and shrubs in my yard, I use my folding saw from time to time to cut large limbs (and small trunks) that are dead or diseased.

Now I admit, I don't really like the formal look in my garden. If that's what you want, your main tool will be hedge shears.

Whatever you're using, you'll want to make sure they're sharp and in good condition. Not only do dull tools make your job more difficult, but good, clean cuts are important for the health of your plant. When you get tears or ragged cuts, those invite disease and infection to your plant. Clean cuts will heal faster and keep disease out. Here's a handy video about sharpening your pruners if they've gotten dull.

Where to Cut
If you like the formal look, it's fairly simple: shear your shrub to the shape you want. You just want to make sure the final shape is slightly wider at the bottom. If it's not, the lower branches can get shaded out by the upper branches and die off. If your shrub does get a dead branch, you'll use hand pruners or loppers to remove it.

If you want the more natural look, you'll use a combination of "thinning" cuts and "heading" cuts.

Thinning cuts involve removing a whole branch back to its origin. Thinning cuts are good for the health of your shrub because they let more light into the canopy. Thinning cuts are especially good for removing crossing branches. Not only are crossing branches less aesthetically pleasing, but they can rub against each other and cause wounds which make way for disease.

A thinning cut: removing a whole branch

Heading cuts have two purposes: 1) they make branches shorter and 2) they make plants branch out more and become bushier (get it? "bushier?"). To make a heading cut, you cut the tip of a branch back to right above a node. A "node" is where a leaf grows out of a branch. When you cut the branch back, it's also where a new branch will grow out. Most of the time, a new branch will grow in whichever direction that node/leaf is facing. If possible, you'll want to cut back to a node that is facing outward, not inward, for a healthier, more attractive plant.

The best branches to make heading cuts on are branches that are too long (sticking out) or where there's a hole in your shrub. A heading cut will cause a plant to branch out, filling in the hole in the overall shape. Of course, if your plant already has a mostly even shape, you can still use heading cuts evenly spaced around the shrub to get a denser look (or, for flowering shrubs, to get more flowers).

A heading cut: making a branch shorter 

When to Prune
As I mentioned, March is a great time to prune, but it's not the only time you can prune. For your regular, green, non-flowering trees and shrubs, you can pretty much prune from January through August. Fall is a bad time for pruning because pruning can cause a sudden flush of new growth, which is easily damaged by an early frost.

For your spring-flowering trees and shrubs, such as azaleas, camellias, dogwood, forsythia, and cherry trees, now is actually a terrible time to prune. You should wait until May or June (after they flower) to do any significant pruning. If not, you'll be pruning off the flower buds, and it will take them another year to grow more buds.

For your summer-flowering trees and shrubs, such as hydrangeas, gardenias, crape myrtles, and magnolias, it's fine to prune in the springtime.

As for roses...whole books could be written on the subject of pruning roses. (Someone actually wrote one, as a matter of fact.) Typically roses are given a good hard pruning in February, leaving 3 to 5 main canes (branches) that are cut back to 2 feet tall. All the smaller branches are removed. Then, as roses bloom, the dead blooms are cut off to encourage the plant to keep blooming. For the ubiquitous 'Knockout' roses, this isn't really necessary--they'll keep blooming anyway--but I think they look nicer if you remove all the old dead flower parts from time to time.

Have fun pruning, and feel free to leave a comment below if you have any questions about pruning your shrub.

Wednesday, February 5, 2014

How to Start Seeds Indoors

After crazy cold weather through most of January, February seems to have warmed up for now, giving me hope that spring will, indeed, come. I spent most of January coping with indoor gardening projects. My mother gave me a terrarium for Christmas so I would have a little tiny jungle to enjoy in the cold of winter. It took me a while to get the water balance right, but I think it's finally stabilizing. I bought some flowers to brighten up my home, too. I just couldn't resist the little tiny purple irises at the grocery store. I put them in my own pot, and added some moss, and they make my living room feel like spring.

Iris reticulata

Now is the perfect time to start thinking about your summer vegetable garden. If you want to save a little money and get the best possible harvest from your garden, you should consider starting your vegetable plants from seed indoors. I admit, I shied away from growing plants from seed in the past. My few attempts never worked out well, and I didn't have the patience. After doing some research, though, I've decided to give it a try again this year for a few reasons:
  • Vegetable plants from the garden center are much more expensive than seeds.
  • When you grow plants from seed, you have many more choices, so you can choose varieties that are better suited to your garden, more disease resistant, tastier, or just more fun.
  • Growing your own plants means you can control how they're grown, especially if growing organically is important to you.
  • Homegrown plants are likely to adjust to your garden more quickly than plants that have been grown 500 miles away, traveled in a truck, and sat in a store for weeks.
  • I've figured out a few "tricks" that aren't hard and will increase my chances of success (and yes, I plan on sharing them with you).

I planted parsley seeds last month, and they've
sprouted nicely.
So, do I have you convinced to try growing your own plants from seed? If you're ready to experiment with starting seeds indoors, I'm ready to share everything I know so far. I'll report back in a couple of months and let you know if it worked. If you are growing seeds indoors for the first time, I'd love it if you would let me know how it worked for you, and we can compare notes! So, step by step, here it goes:

1. Buy good seeds. For a single pepper or tomato, there are many varieties to choose from. For example, I was recently looking at plum tomatoes because they make the best sauce. If you go to Burpee's website, you'll find eleven varieties of plum tomato alone! If you go to other companies, they will have some of the same varieties, but also other ones. Each variety has different features. I usually look for varieties that are naturally resistant to diseases, so I won't have to spend as much time fighting fungus or plant viruses in my garden. If you go to Johnny's Seeds and look at the 'Granadero' tomato, for example, you'll see it's resistant to Tomato Spotted Wilt Virus, nematodes, and blossom end rot. 

You can also choose varieties of vegetables that are more compact (if you have a very small garden), are more heat tolerant, produce more fruit, bear fruit faster, bear fruit longer, or are different colors and shapes, depending on what you like. For the more environmentally conscious, there are many organic and heirloom seeds available. Whatever variety you choose, make sure you choose a reputable seed company--their seeds are more likely to be healthy, viable and disease-free. In addition to Johnny's and Burpee, I also recommend checking out Seeds of Change (all of their seeds are organically grown), and Baker Creek Heirloom Seeds (all heirloom varieties). One more note about shopping for seeds: the earlier you shop, the better your selection. Popular varieties will sell out fast.

A note of warning: not all plants like to be started from seed indoors and transplanted later. A few that do well include peppers, tomatoes, eggplant, and squash.

2. Buy something to grow your seeds in. First, you'll need a container. I bought a 72-cell seed starter tray (also known as a "flat") that came with a tray for water drainage, and a dome to keep the moisture in (see below). You could probably use just about anything as long as it's sterile. Seed starter trays are nice because you can grow many plants in a small space. Also, because they have their individual compartments, the plants are easier to transplant without disturbing the young roots. If you choose to reuse a pot that you've used previously, sterilize it first (a mild bleach solution works well) to kill any remaining plant diseases.

72-cell flat with dome to seal in moisture and tray to collect water
drainage (left), seedstarting mix (right)

After you have your container, you'll need your "dirt." I recommend planting seeds in specific germinating or seedstarting mix. Seedstarting mix, unlike potting soil or garden soil, has the perfect balance of water retention and drainage, is disease-free, and has the right level of nutrients for your young seedlings. I'm experimenting with organic gardening more this year, so I chose an organic seedstarting mix from Gardener's Supply.

3. Find a warm, sunny place. Warm-weather veggies such as tomatoes and peppers need soil temperatures of 70-85 degrees to germinate! If you have a warm spot in your house, like next to an appliance, that would be ideal for starting your seeds. If not, you can buy a heat mat designed for just this purpose. It's a little pricey, but I think it's worth the investment. You can use it for years, and it greatly extends your growing season. I got mine off of Amazon, and it's the perfect size for my seed tray.

Every plant is different, but as a general rule seeds prefer the dark while they're germinating. After they sprout, they'll need a sunny spot next to a window.

4. Get planting...at the right time.  Each type of plant has its own growth rate. Some seeds germinate in a matter of days, others can take three weeks or more. Even after they germinate, some plants grow faster than others. Tomatoes and peppers can be started inside about six weeks before your last frost date. (If you don't know your average last frost date, you can look it up here.) Squash and cucumbers, since they grow so fast, are started only two weeks before your last frost date.

Once you figure out when your seeds need to be planted, you're ready to plant. Here are your six steps, as illustrated below:
     1) Add soil to your container.
     2) Lightly press the soil down into the container with your finger, and add more soil if needed.
     3) Moisten the soil with lukewarm water (a spray bottle works well).
     4) Create a hole for your seeds using an old pencil. (Check the back of your seed packet to see how deep your seeds like to be planted.)
     5) Add your seeds to the hole.
     6) Lightly cover up your seeds with a sprinkle of soil after planting.


5. Don't expect perfection. A friend told me a story once that she and her husband had a little competition. They each planted one seed in a pot and waited to see whose plant would grow faster. Neither seed germinated, and they gave up. It made me laugh. All other things aside, not every seed in a seed packet will germinate. While some plants have a natural germination rate of 99%, others may only have a germination rate of 60%. Out of the ones that germinate, some may be stronger, while others may be weaker. A small percentage of seedlings will probably die, even under the best of circumstances. Know that that's normal, and plant a few extra seeds to be on the safe side.

6. Give your seeds an even supply of water. Seedlings need constant moisture. While most plants in your garden probably like to dry out a little between waterings, seedlings don't. It's harder to give them too much water, but it's easy to give them too little. Seedlings aren't very sturdy, either, so a normal hose or watering can will beat up your tiny little sprouts. If you have a water-tight tray, you can water your seedlings from the bottom, by leaving them in the tray with a layer of water to soak up. Right now I find it easiest to mist them very gently with a spray bottle every day, focusing on the soil, not the plant.

That's it! Every plant is different, of course, but if you follow those guidelines you should be able to successfully grow some of your more common vegetables and herbs from seed. Good luck, and let me know how it works for you!

Monday, November 18, 2013

What to Do When Your Garden Freezes

The weather has been crazy this month. The temperature this afternoon was 84 degrees. Just last week, we reached a record low for November 14 in Macon: 21 degrees.

Fortunately, I was prepared for the freeze. My husband and I bought more sturdy supplies to cover the vegetable garden. (Our last cover involved bamboo stakes and duct tape.) We created a frame using two 10-foot, 1/2"-diameter PVC pipes and covered it with a 6 mm-thick plastic drop cloth. It didn't keep the summer vegetables (or zinnias) from meeting their inevitable demise, but the fall vegetables were quite happy with the arrangement.

My vegetable garden with PVC framing
for cold protection the day aft
er the first
freeze
The freeze killed all the peppers.
The fall vegetables are loving the cooler temperatures.
Clockwise from top left: onions, lettuce, radish, and
cauliflower
 As for the rest of my garden, the ornamentals had a mixed response. Growing up in south Florida, temperatures just don't ever get to 21 degrees, so I still look at freezing temperatures like a fun science experiment. Like any good science experiment, I carefully documented the results. My hydrangeas looked dead the next day. Fortunately, I know they're cold hardy, so I expect they'll look fine come spring. My hostas also took the cue to start winding down for the winter. My roses didn't notice the difference. Both the rose blooms and leaves looked exactly the same as they had the day before. The pansies, too, were unfazed by the cold.

The hydrangea leaves wilted and blackened from the
freeze. The roses and pansies were unaffected.
With some plants still thriving and others dying back for the winter, you may wonder what you should be doing right now in your garden. The combination of sudden cold snaps and surprisingly warm weather confuses plants and people alike. Here are a few tips for caring for your plants in November:

1. Resist the urge to prune shrubs. You might want to jump in and trim back your pathetic-looking hydrangeas (or other shrubs), but the best thing you can do is leave them alone. Pruning signals to plants that they should branch out, and especially in the warmer weather they are likely to put out a bunch of new growth. Even if a plant is cold-hardy, all that tender new growth will be easily damaged when the next freeze hits. Wait until late in winter, when the plants are good and dormant, to do most of your pruning.

2. Resist the urge to fertilize...almost everything. Just like with pruning, fertilizing encourages tender new growth, which can be damaged by a freeze. Your plants need to be sleeping, not growing. Here in zone 8, we have some exceptions. All of your winter annuals, such as pansies, snapdragons, and ornamental kale, should be kept on a regular feeding schedule to maximize their blooms. They will continue growing quite happily through the winter. Your cold weather vegetables, too, can be fertilized as needed.

3. Plant or transplant shrubs. This is a good time to plant roses, blueberries, azaleas, and other shrubs. The cooler weather gives the roots plenty of time to get established before the summer heat hits. (Even when plants are bare and dormant, their roots are still growing.) This is also a good time to move plants to a new location. One of my hydrangeas looked unhappy every afternoon this summer, so I'll probably dig it up and move it to a shadier location in the next couple of weeks.

4. Keep watering. Just because plants are dormant doesn't mean they don't need water. The harsh wind, especially, can dry plants out fast. They don't need to be watered as often as they do in the summer, but if we go through a dry spell, throw a little water on your sleeping shrubs. If you just planted shrubs, they need  frequent water. If your pansies look wilted after a freeze, throw some water on them and they'll perk right up.

5. Rake leaves. As I mentioned in my post on fungus, fallen leaves make the perfect place for plant diseases to hibernate until they return in the winter. For the health of your plants, you should rake up the leaves and either compost them or haul them to the curb.

Happy gardening!

Thursday, October 17, 2013

Lessons from My Vegetable Garden

I can't believe it's been almost a month since I last posted! Between working non-stop and fighting a cold, I could barely get in the garden long enough to water my plants. When I finally recovered, my little vegetable garden was a sad sight. My broccoli seeds had never sprouted. ALL my carrot seedlings had shriveled up and died because I missed a few days of watering them. My block of lettuce seeds looked like they had either been dug up, washed away, or both. The cabbageworms, which I thought I had under control, had multiplied and skeletonized my newest cauliflower transplant. To make matters worse, the cabbageworms managed to do that much damage while still being so tiny that I could barely see them with the naked eye.

New additions to my fall garden:
radishes and spinach

After my mourning period was over, I got to work. I broke out my environmentally-friendly pesticides and killed all the cabbageworms. I realized I still had plenty of time to replant the veggies that didn't make it (and plenty of seeds left in the packets), so I replanted my block of carrots and added to my sad little block of salad greens. While I was at it, I pulled out the okra (it only produced one single, solitary okra in the last 6 months) and planted radishes. Where the broccoli didn't sprout, I sowed spinach. The broccoli was kind of an experiment anyway: I had read it grows better from transplants than directly from seed. I'll try sowing some indoors in the next week and transplanting it outside later on.

Butterflies and moths love my hot pink zinnias.

One thing in my vegetable garden that seems quite happy right now is my zinnia. I planted it so I could enjoy the cut flowers inside, but it's also been a welcome bright spot among the veggies. I particularly enjoyed watching the butterflies on it while I worked in the garden this week.

Gardening is filled with life lessons. I admit it: when I first saw my dead carrots, disappearing lettuce, and chewed-up cauliflower plants, I wanted to give up altogether on my fall vegetable garden. I don't take failure well, and sometimes it's easier to give up than to try again. But life is full of setbacks. Things don't always go like I plan. Sometimes the pests are determined to destroy all my hard work. But in life, as in gardening, sometimes the best way to learn is through trial and error. After all, I started this blog one year ago just for that purpose: so I could keep track of what I did in my garden and learn from my successes AND failures. If I hadn't tried planting my first fall vegetable garden, I wouldn't have learned the dangers of cabbageworms, the necessity of daily watering in the fall, or that broccoli seeds need to be started inside. And if I hadn't tried again, I wouldn't have sat beside my vegetable garden long enough to watch the butterflies dance among the zinnias. Maybe God lets us experience setbacks so we will learn and grow, or maybe just so we'll slow down long enough to appreciate the little things.

So, if you think you have a "brown thumb," just remember: 1) even experienced gardeners lose a crop sometimes, 2) gardening and life are all about trial and error, and 3) celebrate the little moments of beauty that make it all worth it.

Happy gardening!

Sunday, August 4, 2013

Gardening Checklist for August

Now that the busyness of July is over, I've decided it's time to turn my attention back to doing more than just making sure my plants get enough water. Fortunately, they've been very forgiving of their neglect. I picked a little bouquet today from various things blooming in my garden.

A bouquet from my garden: zinnia (Cut & Come Again mix),
'Knockout' rose, 'Flower Carpet Pink Supreme' rose,
tricolor sage, and chocolate mint.

It's still too hot for most gardening tasks, of course. There's not much planting or fertilizing to do right now. But I know fall will come and go all too fast, so I want to get a head start on what I can do now. That way, I'll be prepared to enjoy the nice weather later. Here's my checklist for August:

1. Update my annuals. Not all annuals make it through the summer. My white petunia, for example, fizzled out on me for no real reason. If you live in the South, you can pull out your dead summer annuals and plant new ones now to get you through September (and probably October). This is also a good time to trim, deadhead, and prune back tired annuals for a new flush of blooms next month. While I'm at it, I also need to get back to fertilizing with bloom booster. That way, everything will look lush when I'm lounging on my patio in the fall.

My foxgloves still have a few blooms on them.
If I prune and fertilize, I could get a flush of
blooms in a few weeks.

2. Give my roses some TLC. That three-month rose fertilizer I used in April has been well used up by now, and my 'Knockout' roses are covered mostly in spent blooms. Fortunately, rose bushes can be cut back by as much as half now. The advantage of heavy pruning is that they'll put out new shoots with plenty of blooms. I won't have flowers for a few weeks after pruning, but I should have quite a show in September/October. I'll fertilize when I prune to get that extra boost of growth. I won't be able to do much pruning or fertilizing later in the fall or I'll risk an early freeze damaging new growth.

3. Plant fall vegetables. In the South, everyone loves to grow tomatoes and squash in the summertime, but they usually give up on growing vegetables the rest of the year. I'd like to try some fall vegetables.  Some summer vegetables may also be planted now for a late harvest. Here are a few things you can plant in August in Middle Georgia: bush beans, beets, broccoli, cauliflower, collards, cucumbers (after Aug. 20), kale, potatoes (before Aug. 15), and turnips. (If you're curious, here's a vegetable planting chart for Georgia with more details.) Since I'm planting in an existing bed, I'll add a handful of compost before I plant my fall veggies to replace the nutrients used up by my summer veggies.

4. Plan future beds. Fall is a great time to plant perennials and shrubs here in the South. In order to take full advantage of that narrow window of planting time, I need to map out my plan of attack now--which plants to move, where to add new beds, and what kinds of plants I want to try. I'll track the sun patterns in my planting areas (paying close attention to what gets the hot afternoon sun) and consider which of my plants have been most successful, so I might repeat them in other areas. If I do all my research now, I should have a good shopping list when I visit the garden centers in September. If I feel up to it, I might even start doing a little soil prep for my new beds.

While I was out assessing my garden, a butterfly landed on me. It's just
one of the little delights of gardening.

What are you most looking forward to in your garden this fall? Happy gardening!

Friday, July 12, 2013

The Fungus is Among Us

My little garden has been fairly productive, despite my hiding inside from the heat, rain, and mosquitoes. I emerge for a few minutes every couple of days to make sure everything's still alive, pick caterpillars off my tomato vines, and harvest the fruit of my springtime labors. I've continued to harvest some beans every week, and the cherry tomatoes have been tasty (I just have to make sure to harvest them while they're orange--by the time they're red the heavy rains have split the skins). My little sunflower just emerged in the vegetable garden this week, too.

I bought a sunflower "mix", so the color was a bit of a surprise.
What do you think of my little burgundy sunflower?
At the beginning of the summer I was worrying about my plants getting enough water in the heat of July. Little did I know that we would have record rainfalls! All that wet foliage is the perfect breeding ground for fungus, one of the many plant pests that can plague your garden.

I'm not talking about the mushrooms that might pop up in your backyard--those are usually harmless (to your plants, at least--I don't recommend picking one and eating it unless you're an expert). I'm talking about the fungi you might not even realize are fungi: blackspot on your roses, powdery mildew on your crape myrtles, and Botrytis on your strawberries. There are also the ones relatively unseen: the ones with crazy names (like Pythium and Phytophthora) that cause root rot, crown rot, and damping-off. From a distance it might look like your plant is dying for no reason, but upon closer inspection you'll see the real culprit.

I took a walk around my garden and discovered a few fungi affecting my plants.

Entomosporium is a common fungal disease
on Indian hawthorn.
The shot-hole fungus on my ornamental cherry
tree loves all this rain.
I'm pretty sure this is a type of fungal leaf
spot on my lemon balm.

I'm not sure what fungus is growing on my
potted palm. I'm hoping it's just feeding
on the dead leaves and won't hurt it.

As you can see, it's not always easy to identify the many fungal diseases that plague our plants. Unless you're a plant pathologist, though, it's not really necessary to know all of them. When I worked at the USDA Fruit & Nut Lab in Byron, GA, the plant pathologist I worked with would take samples of diseased pecan leaves and stick them in petri dishes to see what grew--a bacterial leaf spot or a fungal leaf spot, for example. If your plant looks diseased, the simple fact that we have so much rain makes fungus a likely candidate. So if you suspect fungus in your garden, here are some tips for treatment:

  • If the damage is mostly cosmetic, don't worry about it. Many fungi, like those pesky leaf spots on Indian hawthorn, won't kill your plant. I don't like to go overboard with the chemicals, so I tolerate a certain level of disease on my plants. It's not worth spraying my huge cherry tree when I know the fungus will go away come fall. That same leaf spot affects my lemon balm every summer, but the damage is always minor.
  • If the damage is minor, remove the infection. If there are spots on only a few leaves, remove the diseased leaves and throw them away (or compost them thoroughly). Clean up the fallen leaves under your plant where disease might be hiding. A lot of disease spreads by rain splashing off of existing infection.
  • If there are black spots on your rose, go buy a fungicide for roses. Now. Blackspot (yes, that's actually the name) is a fungus that plagues most roses. It not only causes black spots but yellowing and defoliation. It can make your beautiful rose bush ugly fast. Buy a fungicide for roses.
  • If the damage is significant, talk to a friendly professional. The nice people at your local garden center (not Home Depot or Lowe's) probably know a lot about plants. They can recognize powdery mildew in an instant, and they can recommend the best sprays for various diseases. If you don't know a good local garden center, look up your county extension agent. You can take a leaf sample down to their office, or snap a couple (close-up) pictures with your phone and e-mail it to them. They likely have a plant pathologist on staff who can ID it for you, and they'll tell you what to buy at Lowe's or Home Depot (or whether you should give up altogether and burn your plant to the ground).
  • If you're using a spray, follow directions. Read all that fine print. The time of day and weather conditions can greatly affect the effectiveness of your spray. You also want to pay attention to safety warnings (like "avoid contact with skin").
Whether or not you're battling fungus now, there are things you can do to prevent future fungal wars:
  • Amend your soil. There's not a whole lot you can do once your plant has root rot or crown rot except keep it from happening again. If you have heavy clay soil (common in the South), water won't drain well, and fungus can breed that can kill your roots. Mix in plenty of organic matter (such as compost) before planting to improve drainage. If you're gardening in pots, always use fresh soil (since old soil may be harboring disease) and make sure there's a hole in your pot so water can drain.
  • Buy disease-free plants. Buy your plants from reputable sources, and inspect them carefully before taking them home. You don't want to bring disease home with you.
  • Buy disease-resistant plants. If you don't want to spray for blackspot, there are disease-resistant varieties of roses you can buy. My 'Flower Carpet' and 'Knockout' roses, true to their care-free promise, have remained blackspot-free. My other roses have not been so lucky. It's the same with all kinds of plants--some varieties are more resistant to disease than others. When you're buying vegetables, read the seed packets to find disease-resistant hybrids.
  • Clean up your garden. Those fallen leaves may look like great mulch, but they're breeding grounds for fungus. Rake them up in the fall and either bag them or compost them. If you choose to compost, make sure they're good and decomposed before using the compost in your garden.
Happy gardening!

Tuesday, June 4, 2013

5 Tips for Watering Your Plants This Summer

It's officially summer here in Georgia. Temperatures have reached the 90s, and both my hydrangeas and Flower Carpet roses have started blooming.

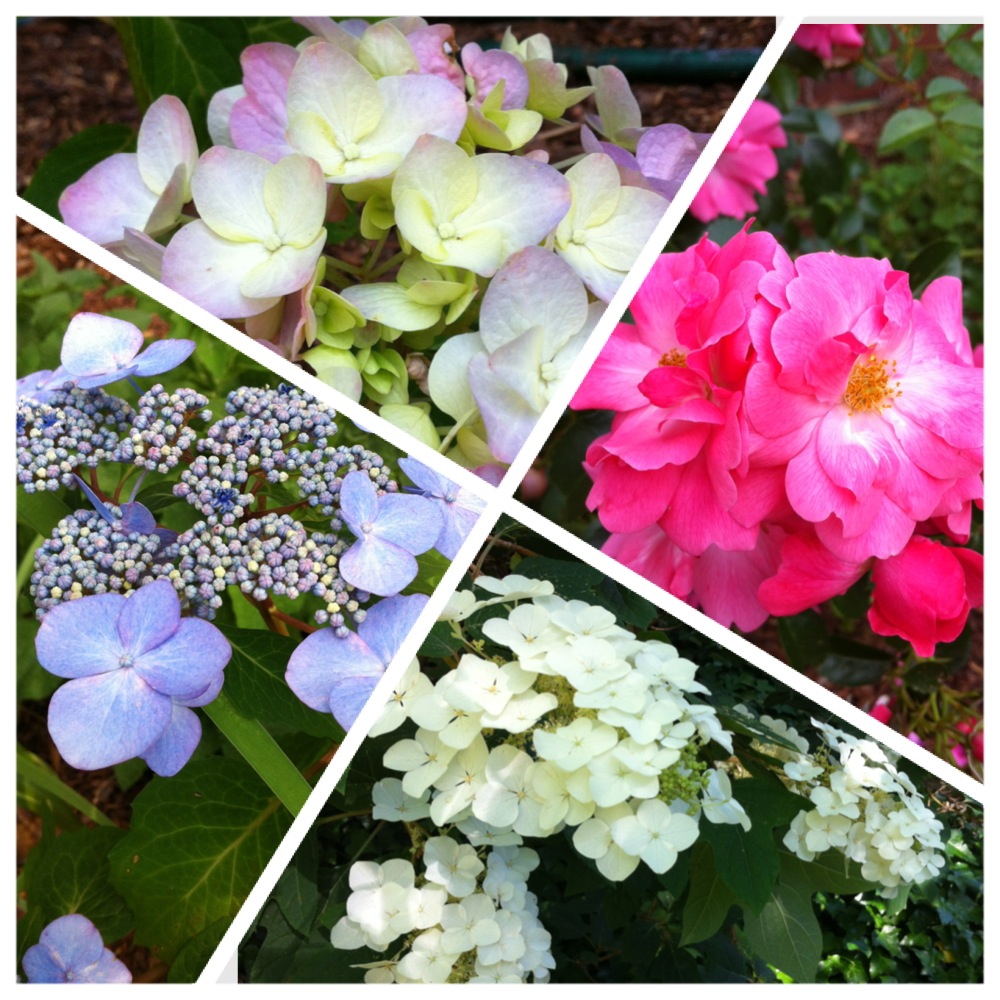
Clockwise from top: Hydrangea (variety unknown), 'Flower Carpet
Pink Supreme' rose, oakleaf hydrangea, and 'Twist n' Shout' hydrangea

The summer heat means it's time to turn our attention to watering. Lack of water (or sometimes too much water) is one of the leading causes of plant death. I've killed more plants than I can count simply because I went out of town for a long weekend in July, left my plants out on the balcony, and didn't get a plant sitter. (Fortunately I have two excellent plant sitters now, so my garden is in safe hands when I travel.)

Here are some tips for properly watering your garden this summer:

1. Water your flowers and and herbs after the top inch of soil has dried out. Just stick your finger in the soil to determine if it needs to be watered. Of course, some plants (like impatiens) like more water and others (like verbena) like less, so it always helps to know the specific needs of your plant.

2. If you can, water early in the morning. This practice has a couple of benefits. For one, you reduce plant diseases. If you water late in the day, water on the leaves doesn't have time to evaporate and just sits overnight. Wet leaves are the perfect breeding ground for fungus. Secondly, if you're using a sprinkler, you waste less water. If you water in the heat of the afternoon, much of the water evaporates before it reaches your plants.

3. Don't let your vegetable plants dry out. Lettuce, radishes, bell peppers, beans...they all like constant moisture for the best harvest. Hot peppers are one exception--they like to dry out between waterings. Be careful with overwatering your carrots and tomatoes as it gets closer to harvest--a sudden influx of water will cause the carrot or tomato fruit to split.

4. Give your lawn an inch of water a week. Some weeks they may get this from rainfall, other weeks you'll need to put a sprinkler out. You can get a container like a soup can and mark one inch from the bottom with a permanent marker to make a cheap rain gauge. Leave it outside, and if rain hasn't filled your can to the line by the weekend, water your lawn until it does reach the one-inch mark.

5. If you planted any trees or shrubs this spring, they also need an inch of water per week. Make sure they get regular water through the hot summer and into fall. Established trees and shrubs will benefit from extra watering during a drought, but otherwise can be left alone.

Happy gardening! What's blooming in your garden this month?

Thursday, May 16, 2013

My Patio Garden

From college until we bought our home last summer, my gardening was limited to windowsills, patios, and balconies. Even though I have plenty of ground to dig in around our new home, I continue to do a lot of container gardening on our patio. Some of the plants on our patio I've had for a few years. Others are recent additions. 


I've always loved herbs, and they're well-suited to pots. Some herbs I have simply because they smell nice, even though I have no idea how I'd cook with them (such as chocolate mint, lemon balm, and lemon-scented geranium). It's nice having them in arms-reach on the patio where I can enjoy their scent while relaxing with a cup of coffee in the morning.

Clockwise from top left: Strawberry, basil, rosemary,
jalapeno pepper, lemon-scented geranium, chives, and
lemon balm.

 It's nice to have the more useful herbs on the patio, too, for a quick snip while I'm cooking. Currently I have basil, chives, and rosemary there. I have some strawberry plants that I've grown in the same pot for a couple of years. They're not very fruitful, but it's fun to pick a fresh strawberry on my patio. I planted a jalapeno pepper plant in a pot upon request from my husband. He wanted to do an experiment to compare how they grow out in the raised bed versus how they do in a pot. I'll let you know how it turns out.


My godmother created this lovely seashell planter for me when I was in high school. I held onto it for years until I finally was able to decide what I wanted to plant in it and get around to putting it together. When I saw a remarkable collection of succulents for sale at Walmart last fall, I knew I'd found the perfect thing. The shallow planter dries out very quickly, but succulents don't need much water anyways. One of the plants died, but the others have more or less thrived.

'Knock Out' rose (left) and snapdragons (right) are in
bloom on my patio right now.

Normally I grow a lot of flowers in pots. I've been so busy with the rest of the garden, I haven't gotten around to planting all my summer annuals yet. I was given two Knock Out roses by friends last fall. I planted one in the ground, and the other I've decided to keep on the patio for now. The snapdragons I've had for a year and a half! I thought that they were supposed to be annuals (which means they should be dead by now). I didn't have any other plans for that pot, though, so I just cut them back when they looked sickly and they kept coming back. There's a Carolina jessamine in the lion planter next to the snapdragons that came with the house. It doesn't look like much now, but it had stunning flowers in February.

Camellia (left) and hydrangea (right) are happy in the
shade under the covering on my patio.

In addition to the rose, I have some other shrubs on my patio. I bought a camellia on sale a couple of years ago, and I thoroughly enjoyed its white flowers on my patio this winter. It won't grow very big in its little pot, but it's happy enough for now. I decided to keep one of my hydrangea cuttings on the patio this summer. It likes shade, and I can baby it while it gets a bit bigger and I decide where to plant it. Who knows, it might even bloom on my patio!

Some tips for container gardening in the South:
  • Buy good potting mix. It's worth the extra dollar for Miracle Gro brand.
  • Buy large pots, especially if you want to grow shrubs or vegetables. Smaller pots are fine for annuals or some herbs, but just remember: the smaller the pot, the more often you have to water it. In July, that can mean watering twice a day, depending on the plant.
  • Choose plants suited to how much sunlight your patio/balcony gets. (See my post Flowers Anyone Can Grow for more on how much light your plant needs). Patios and balconies usually get a lot of shade from the building and nearby trees.
  • In the summer, expect to water flowers, herbs, and vegetables once a day (unless you get rain). I've killed more plants just because I forgot to water them in the summertime (or went out of town for the weekend and didn't get someone to water my plants for me).
  • If you want really lush plants, fertilize regularly with a water-soluble fertilizer like Miracle Gro (either all-purpose, or one specifically for flowers, depending on the plant).


Vegetable Garden Update: It's been 33 days since I planted my vegetable garden, and I think it's looking lovely, don't you? We added a homemade trellis for the tomato plants (on the left side of the picture). I'm not sure the radishes are going to be edible. I remembered reading they have a really short harvest time, so I checked my book to see when they would be ready. It said 4 weeks from seed until harvest. It's been more than 4 weeks, so I kept reading until I found my answer:  "Don't let radishes stop growing or dry out;  lack of water causes hot-tasting and pithy radishes." I'm pretty sure I let the radishes dry out several times (hey, most plants like to dry out a little between waterings!), so that would explain why they're not getting fat and round. I'll have to try again in the fall (radishes don't like the heat of summer, either).

Friday, April 19, 2013

Flowers Anyone Can Grow

My garden is chugging along. The radishes have sprouted, the onions are putting out shoots, and my bugleweed (Ajuga reptans 'Purpurea') started blooming (and spreading) this week. The bugleweed came to me as a clump that some friends gave me out of their garden, and it seems to have established itself splendidly.

My bugleweed has little blue-purple flowers.
 Not only are the plants I planted doing well, but I also have some volunteers! My compost pile hasn't given me any compost yet, but it has a handsome tomato seedling growing out of the side.

A 6-in. tomato seedling is growing out of my
compost pile.

I have friends that keep insisting that they kill everything they try to grow. Well, I'm here to turn anyone who wants to be a gardener into a gardener. I posted last month on the 5 Things "Green Thumbs" Know, and went into more detail about how to put some magic in your dirt and how to plant a plant. I'll talk about how to water your plants soon, but I thought maybe my good readers would like a list of a few flowering plants that aren't too difficult to grow--to increase your chances of gardening success here in the hot, humid South.
.
Before you figure out which plants you can grow, the first question you need to answer is how much sunlight you have. There are roughly 3 categories: full sun, part sun, and full shade. Plants that prefer full sun need direct sunlight almost all day--8 hours or more. Plants that like part sun like to be shaded half the day--only like 4-6 hours of direct sunlight. Part sun areas also include areas that get light shade all of the day--like under a pine tree where plenty of sunlight comes through the trees. Plants that like full shade don't need any direct sunlight. If you look at the label on any plant at Home Depot or Lowe's, you'll see a little symbol that tells you how much sunlight that plant prefers. If you're at a local garden center, they don't always have those commercial labels, but the people who work there will be happy to tell you what the plants need.

The universal symbols for the sunlight needs of a plant.

Here in the South, those recommendations aren't set in stone. Sometimes plants that prefer full sun in cooler climates will benefit from afternoon shade here in the heat of summer. They won't bloom as much as they would in full sun, but they might survive July and August!

One more thing before you run out to your garden center--make sure to pick plants that look healthy and don't have too many flowers. While your instinct may tell you to pick the most beautiful plant, a plant with mostly buds and only 1 or 2 flowers will adjust better to its new home than one that's covered in blooms.

And now...drumroll please...The List:

Full Sun
Daylilies (Hemerocallis hybrids)*
Lantana (Lantana hybrids)
Knock Out roses (Rosa 'Knock Out')
Gardenia (Gardenia jasminoides)
Butterfly bush (Buddleia davidii)
Verbena (Verbena species and hybrids)
Annual vinca/Madagascar periwinkle (Catharanthus roseus)
Rosemary (Rosmarinus officinalis)
Gaura (Gaura lindheimerii)
Lily-of-the-Nile (Agapanthus species and hybrids)
Moss rose (Portulaca grandiflora)

Part sun
Everything in the full sun list can tolerate part sun, they just might not grow as big or bloom as much.
Hydrangea (Hydrangea macrophylla)
Camellia (Camellia japonica or Camellia sasanqua)
Azalea (Rhodendron hybrids)
Geranium (Pelargonium hybrids)
Begonia (Begonia hybrids)

Full shade
Plantain lily (Hosta hybrids)
Periwinkle (vine) (Vinca major or Vinca minor)
Bugleweed (Ajuga reptans)
Coral bells (Heuchera species and hybrids)

*The words in parantheses are the scientific name for the plant. Since common names can sometimes be confusing--a plant can have more than one common name, or two plants can have the same common name--the scientific name will help you know you're getting exactly what you're looking for.

Are you a novice gardener? Do you have any questions for me?

Thursday, March 28, 2013

A Good Start: How to Plant a Plant

A few weeks ago I won a contest on Your Easy Garden blog, and the prize was 3 Flower Carpet roses. I wasn't previously familiar with them, but they're supposed to be low-maintenance, disease-resistant, and (more recently) bred to tolerate heat and humidity. I just planted them last week. They're a spreading rose, so I made new flower beds with plenty of space for them. I planted one of my roses under the perfect conditions--full sun, good drainage. But I was determined that I wanted a rose in front of my house, so I planted it in mostly shade, heavy clay soil, at the bottom of a gutter spout. We'll see if all my soil prep will keep my rose alive in spite of my better judgment!

There's a rose bush there, if you look closely.
It will have leaves soon, I promise.
What my Flower Carpet roses should look like in a few months.

I decided to give one of them to my mother-in-law. I had never ordered a bareroot (without soil) plant before, so I carefully followed the 6-step instruction sheet that came with it. As we were planting it, my father-in-law commented, "It's a good thing you did it because I would just have dug a hole and stuck it in the ground." I think that's what most people do when they're planting something--just stick it in the ground. The way you plant something, though, can affect whether the roots get established well, whether the plant gets the right amount of water, or whether the plant gets disease. Don't worry--doing it right isn't actually that complicated. I'll give you a few tips.

1. Wider is better, deeper is worser. One of my horticulture professors taught me this rule of thumb for what size your hole should be. It's terrible grammar, but it stuck with me. To be more exact, your hole should be exactly as deep as your root ball (or the pot your plant is coming out of), and about twice as wide as your root ball. This is more important when you're planting strong, long-living trees and shrubs, but less important if you're planting an annual like a pansy that you'll rip out in a few months.

2. Break up the roots. When you buy a plant, it may be "root-bound", which means the pot is full of roots, some of which may be growing in a circle (the shape of its pot). You want to encourage the roots to grow beyond the size and shape of the pot it was in--the plant won't necessarily do this on its own. Just take your hand, grab the roots at the bottom, and pull them apart. If you break some small roots, that's fine--they'll grow back. If it's really bad, sometimes I'll take my pruning shears and make a few vertical cuts down the sides of the root ball.

3. As you plant it, make sure the top of the original soil of the plant is even with the surrounding soil. You shouldn't be putting soil on top, or planting it so shallow all the water runs off. There's a few exceptions. Tomato seedlings like to be planted deep, so you cover up the first few inches of stem. When I planted my rose, it was in heavy clay soil (and roses like well-drained soil), so I planted it slightly raised up to try to improve drainage (I hope it works!).

After I planted my rose, I watered it really well.
 Happy planting! What are you planting this spring?

As always, feel free to comment with any questions you have.

Sunday, March 24, 2013

Preparing Soil for Planting

We've had some crazy weather this past week, but spring is definitely here. My tulip bulbs emerged--I'm still waiting on blooms. Our cherry tree has put out a few blooms, but it looks like the cold snap has left it mostly covered in buds. Here's hoping it will be covered in flowers for Easter.

A sure sign of spring: my tulips are emerging.

In my last post, I mentioned how the magic for growing things is in the dirt. Well, this past week I worked a little magic in preparation for all the planting I am doing this spring. One bed was already there--we just removed the existing shrubs and improved the soil.  The other was an entirely new bed, but the process was basically the same for both.  I'll take you step by step through that process.

1. Break up the soil. I'm fortunate to have a husband who is good with a shovel. The soil in most of our yard is very compacted clay, so he alternated between a shovel and a pick mattock to loosen up the soil.


After that I came behind him with a little combo hoe and cultivator mattock. The sharp hoe side breaks up the smaller chunks of clay, and the cultivator side is great for stirring and fluffing. I kept going until the whole bed was tilled to a depth of 6 inches. I probably should have gone deeper, but that was all I had the energy for. Of course, if you have better soil than me, this whole step will take a lot less work.


2. Add compost. There are many different soil amendments available, but if you have to pick one, use compost.  If your soil is too sandy, you'll have to constantly pour water and fertilizer into it just to keep your plants alive. If your soil is heavy clay (like mine), your plants can drown or your roots can rot. Compost can improve any kind of soil--it adds drainage to clay soil, retains moisture in sandy soil, and adds nutrients to boost. I only started my compost bin last fall, so my pile is still cooking. Fortunately, you can buy compost at your local garden center. You'll want to add about one part compost for every one part soil. If you already have soil that's rich in organic matter and has the right balance of moisture, you'll need much less. If you have poor soil, you might want to add more.


3. Mix it up. After adding a few inches of compost, I took the cultivator side of my little hand tool and mixed it in thoroughly. After breaking up the soil previously, this step was pretty easy.


And that's pretty much it! Now you have a nice, healthy bed ready for planting. Depending on the size of your bed and the quality of your soil, you can knock it out in a couple of hours and reap the benefits for years.


Friday, March 15, 2013

5 Things "Green Thumbs" Know

People always tell me, "I have a brown thumb" or "my grandfather had a green thumb." I actually don't like those terms at all. It makes it sound like gardening is a magical talent--either you're born with it, or you're not. Gardening is really a learned skill. I can grow things because I've spent a long time learning about and practicing gardening (and your grandfather probably spent many years gardening, too). If you consider yourself a brown thumb, I'll give you a head start by sharing with you the basic gardening principles I've learned in the last 20 years. I realize I'm touching on a lot of concepts that may be unfamiliar if you have no previous gardening knowledge. I'll go more in-depth on these in later posts.

1. Location, location, location. Otherwise known as "the right plant in the right place", this principle refers to the fact that different plants have different requirements. If you ignore these requirements, your plant will under-perform at best, or die at worst. Sure, I'll push the boundaries sometimes, but I don't plant something in a place that obviously won't give that plant what it needs. What do plants need? The right amount of sun, the right amount of water, and the right temperatures. Read your plant labels. If you want to branch out a little, pick up a good plant book. (The Southern Living Garden Book is my go-to).

2. The magic is in the dirt. Half of a plant (sometimes more) is underground. If you have bad soil, your plant will never be happy. Good soil gives your plant the right amount of water and nutrients. You can do a lot to improve your soil. I'll dedicate a post to this soon. If your garden consists of what you can grow on your patio or balcony, then your answer is simple: buy good potting mix. I bought cheap potting mix once--it wasn't worth it.
Both of these pansy groupings are currently in my garden.
I prepared the soil before planting one of the groups,
can you tell which one?
3. There is such a thing as too much of a good thing. Water, fertilizer, and sunshine are all good things, but too much can kill plants if you're not careful. Too much fertilizer can fry any plant, too much sunshine can fry a shade-loving plant, and too much water can drown a plant (unless its native habitat is a wetland).

4. Sometimes plants die. A lot of gardening is trial and error. Despite your best efforts, occasionally plants die anyway--that doesn't make you a "brown thumb". It could be killed by disease, you might not have the right climate for it, or it might just give up for no real reason. I've killed a lot of plants in my life, too, but it's all part of the learning process. I don't have patience for plants I have to baby too much, either. If something dies despite reasonable effort, I just won't plant another one--it obviously wasn't a good fit for my garden.

5. Your local garden center is your best friend. By "local", I DON'T mean the closest Home Depot or Lowe's. I mean some place owned locally, and staffed by people who are gardeners themselves. Those people are treasures of information. They'll tell you how to take care of your plants in your climate. If you bring in a leaf with disease or insect pests, they can tell you what pesticides to use. Not to mention, a good garden center will only sell you high-quality plants that are suited to your climate.