Showing posts with label compost. Show all posts

Wednesday, April 22, 2020

Fighting entropy

Gardens are a lot of work. And mine, in particular, is continually attempting to return itself to something like a forest. A weedy forest. Cute wooden structures break down over time, and tree seedlings quickly threaten to take their place.

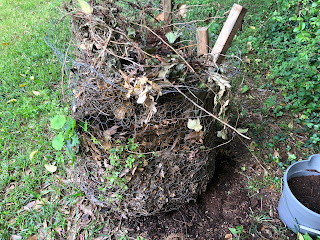
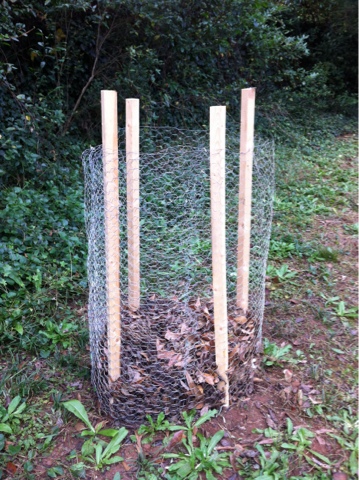
The compost bin my husband and I built in 2012 is still standing, amazingly. It leans a little bit, and the wooden posts are turning into compost, but the chicken wire cylinder is still upright and full of compost. I add all of our fruit and vegetable scraps to it regularly, as well as leaves from our yard when I start to clean up the garden every spring.

The compost bin in 2012
The compost bin in 2020.
Besides that, though, it's been a little neglected. Sure, if you're a dedicated composter, you'll turn your compost pile regularly with a shovel or pitchfork. But I'm lazy, and not really in a hurry. And, as I said, nature still will break things down over time, whether or not you turn your pile. It just takes a little longer. Since I did so little gardening last year, I didn't have much need for compost. Even when I am gardening, I probably produce more compost than I have use for.

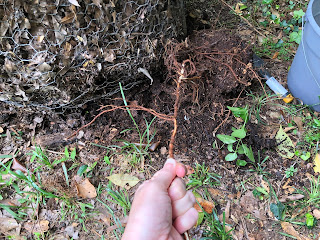
So over time, all that rich, mature compost just sat at the bottom of the pile. I needed more soil to pile up over my potatoes, so I decided to substitute my compost in pinch. It's something in between soil and mulch, so I hoped it would serve the purpose well. When I tried to pull some out from the compost bin, though, I found something like tree roots had made themselves at home there. It was clear my compost was overdue for some attention. So I lifted up the chicken wire and went to town pulling out thick roots of all kinds. After that I took a shovel to the top and tried to break up and stir up the leaves and twigs I had added. It should be much happier now.
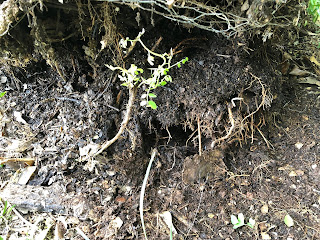
It looked like a tree was trying to grow UNDER the compost?

And more roots in the compost pile....

Much better!

Roots aside, I was still able to get two buckets of compost out of my pile, and covered up my potatoes as best as I could.
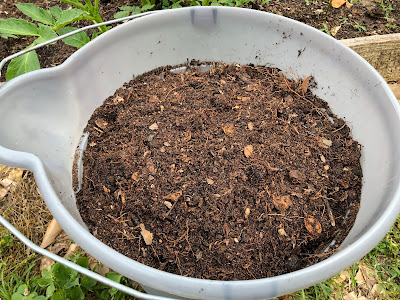
My compost is somewhere in between soil and mulch.


My little potato hill after adding compost to my potatoes

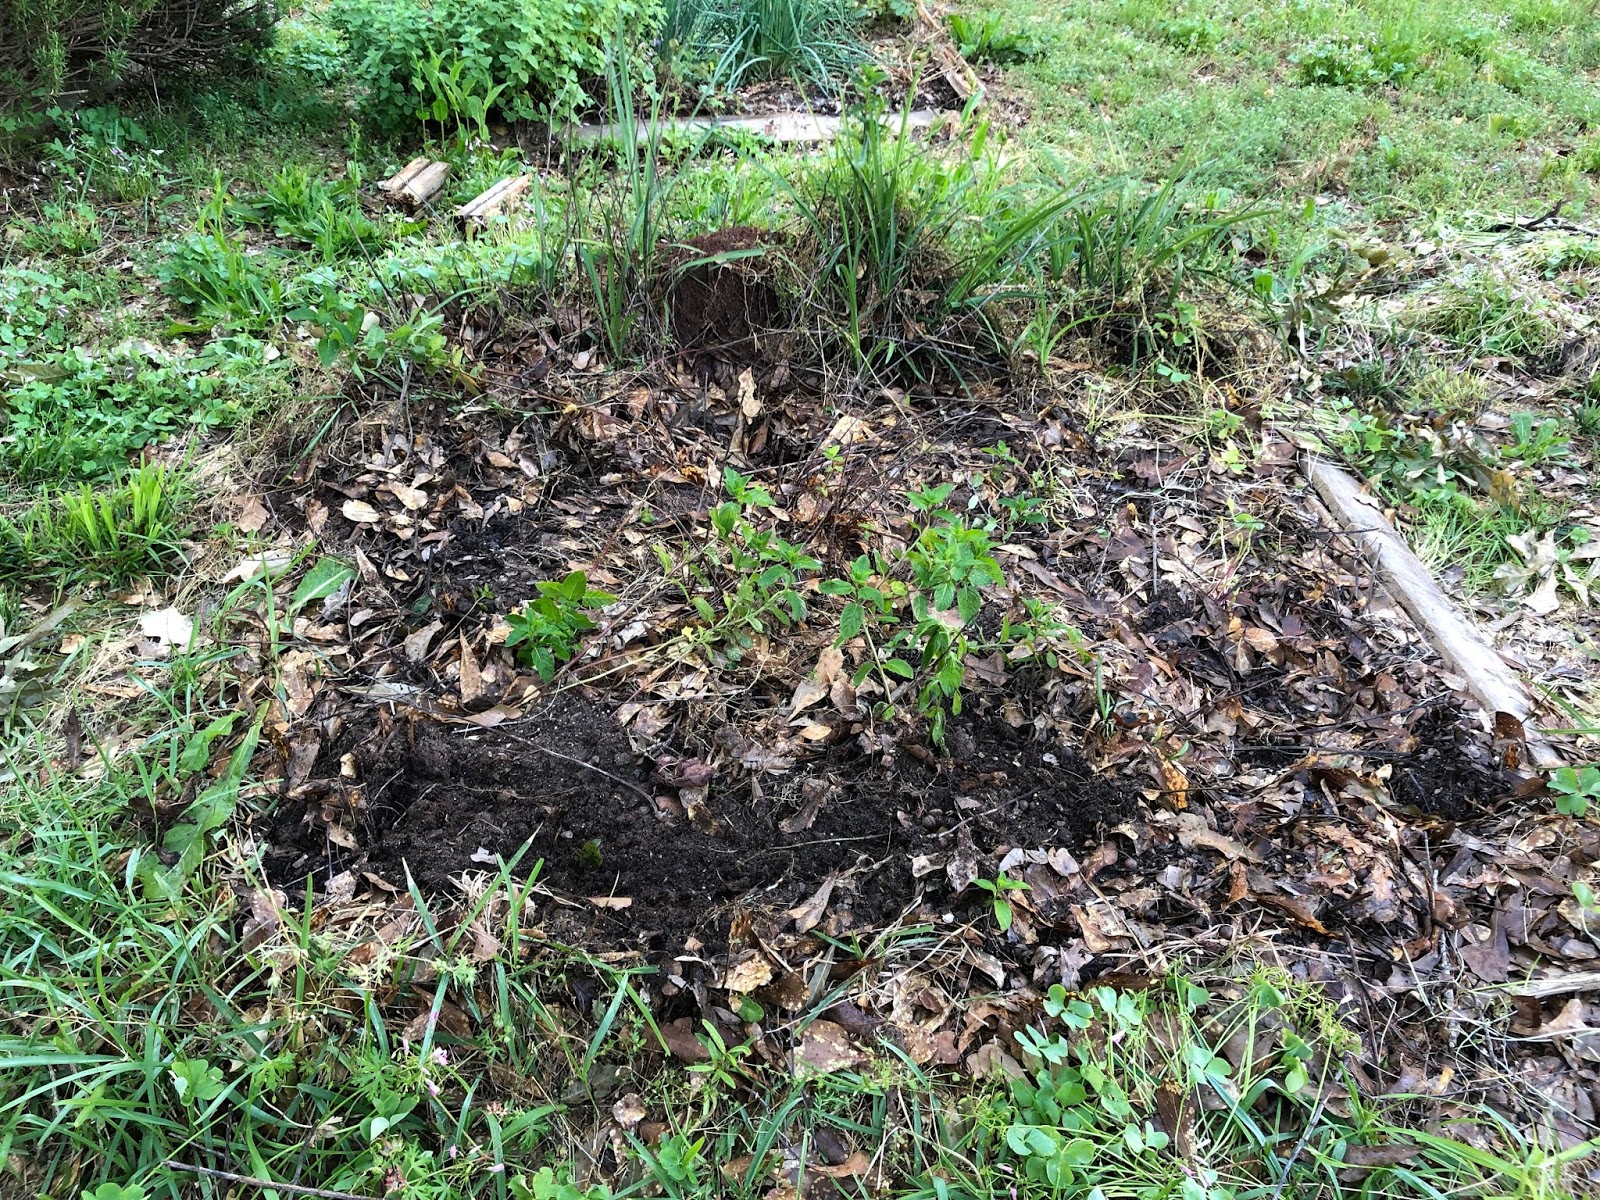
My next project was the mint bed. I wish I had gotten a before photo, but frequently I just notice things and start working on them and then only think about getting a photo when I'm halfway through. Basically, it didn't look like a mint bed anymore. It was mostly oak seedlings, oxalis, and other weeds. I was amazed to discover there was actually still mint growing in there when I looked closely.
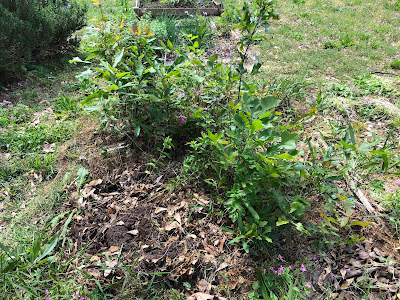
This once was a raised bed full of spearmint...halfway done removing the weeds.
I thought I would just mow the whole thing down, but I was afraid the tree seedlings would find a way to grow back. (Also, there's a large ant pile living in there.) Since there actually was some mint in there, too, I decided to take a more surgical approach. I pulled up the oxalis by hand and used a shovel to dig up every tree seedling. With the mint roots being much more shallow than the oak roots, I thought it might survive the process. (And if not, oh well--I was ready to give up on all of it anyways.) When I finished, I gave the mint a good watering to help it through the trauma.

It's not pretty, but weeds are gone! Don't let that mint fool you--it could fill that entire bed by the end of the summer.
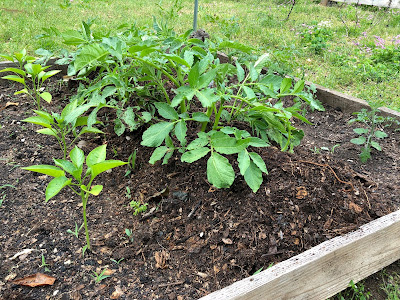
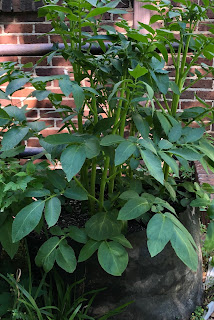
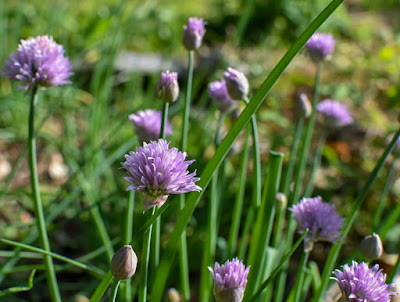
Weeds aren't the only thing flourishing in my garden, though! Can you believe how much my potatoes have grown since my last post? And my potatoes in the grow bag have grown into a small shrub! Even the chives are flowering this week.
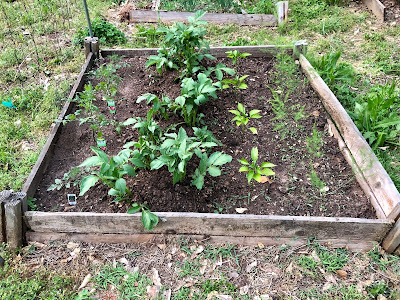
Left to right: tomatoes, potatoes, bell peppers, asaparagus

Potato bush
Chives in bloom

Friday, July 12, 2013

The Fungus is Among Us

My little garden has been fairly productive, despite my hiding inside from the heat, rain, and mosquitoes. I emerge for a few minutes every couple of days to make sure everything's still alive, pick caterpillars off my tomato vines, and harvest the fruit of my springtime labors. I've continued to harvest some beans every week, and the cherry tomatoes have been tasty (I just have to make sure to harvest them while they're orange--by the time they're red the heavy rains have split the skins). My little sunflower just emerged in the vegetable garden this week, too.

I bought a sunflower "mix", so the color was a bit of a surprise.
What do you think of my little burgundy sunflower?
At the beginning of the summer I was worrying about my plants getting enough water in the heat of July. Little did I know that we would have record rainfalls! All that wet foliage is the perfect breeding ground for fungus, one of the many plant pests that can plague your garden.

I'm not talking about the mushrooms that might pop up in your backyard--those are usually harmless (to your plants, at least--I don't recommend picking one and eating it unless you're an expert). I'm talking about the fungi you might not even realize are fungi: blackspot on your roses, powdery mildew on your crape myrtles, and Botrytis on your strawberries. There are also the ones relatively unseen: the ones with crazy names (like Pythium and Phytophthora) that cause root rot, crown rot, and damping-off. From a distance it might look like your plant is dying for no reason, but upon closer inspection you'll see the real culprit.

I took a walk around my garden and discovered a few fungi affecting my plants.

Entomosporium is a common fungal disease
on Indian hawthorn.
The shot-hole fungus on my ornamental cherry
tree loves all this rain.
I'm pretty sure this is a type of fungal leaf
spot on my lemon balm.

I'm not sure what fungus is growing on my
potted palm. I'm hoping it's just feeding
on the dead leaves and won't hurt it.

As you can see, it's not always easy to identify the many fungal diseases that plague our plants. Unless you're a plant pathologist, though, it's not really necessary to know all of them. When I worked at the USDA Fruit & Nut Lab in Byron, GA, the plant pathologist I worked with would take samples of diseased pecan leaves and stick them in petri dishes to see what grew--a bacterial leaf spot or a fungal leaf spot, for example. If your plant looks diseased, the simple fact that we have so much rain makes fungus a likely candidate. So if you suspect fungus in your garden, here are some tips for treatment:

  • If the damage is mostly cosmetic, don't worry about it. Many fungi, like those pesky leaf spots on Indian hawthorn, won't kill your plant. I don't like to go overboard with the chemicals, so I tolerate a certain level of disease on my plants. It's not worth spraying my huge cherry tree when I know the fungus will go away come fall. That same leaf spot affects my lemon balm every summer, but the damage is always minor.
  • If the damage is minor, remove the infection. If there are spots on only a few leaves, remove the diseased leaves and throw them away (or compost them thoroughly). Clean up the fallen leaves under your plant where disease might be hiding. A lot of disease spreads by rain splashing off of existing infection.
  • If there are black spots on your rose, go buy a fungicide for roses. Now. Blackspot (yes, that's actually the name) is a fungus that plagues most roses. It not only causes black spots but yellowing and defoliation. It can make your beautiful rose bush ugly fast. Buy a fungicide for roses.
  • If the damage is significant, talk to a friendly professional. The nice people at your local garden center (not Home Depot or Lowe's) probably know a lot about plants. They can recognize powdery mildew in an instant, and they can recommend the best sprays for various diseases. If you don't know a good local garden center, look up your county extension agent. You can take a leaf sample down to their office, or snap a couple (close-up) pictures with your phone and e-mail it to them. They likely have a plant pathologist on staff who can ID it for you, and they'll tell you what to buy at Lowe's or Home Depot (or whether you should give up altogether and burn your plant to the ground).
  • If you're using a spray, follow directions. Read all that fine print. The time of day and weather conditions can greatly affect the effectiveness of your spray. You also want to pay attention to safety warnings (like "avoid contact with skin").
Whether or not you're battling fungus now, there are things you can do to prevent future fungal wars:
  • Amend your soil. There's not a whole lot you can do once your plant has root rot or crown rot except keep it from happening again. If you have heavy clay soil (common in the South), water won't drain well, and fungus can breed that can kill your roots. Mix in plenty of organic matter (such as compost) before planting to improve drainage. If you're gardening in pots, always use fresh soil (since old soil may be harboring disease) and make sure there's a hole in your pot so water can drain.
  • Buy disease-free plants. Buy your plants from reputable sources, and inspect them carefully before taking them home. You don't want to bring disease home with you.
  • Buy disease-resistant plants. If you don't want to spray for blackspot, there are disease-resistant varieties of roses you can buy. My 'Flower Carpet' and 'Knockout' roses, true to their care-free promise, have remained blackspot-free. My other roses have not been so lucky. It's the same with all kinds of plants--some varieties are more resistant to disease than others. When you're buying vegetables, read the seed packets to find disease-resistant hybrids.
  • Clean up your garden. Those fallen leaves may look like great mulch, but they're breeding grounds for fungus. Rake them up in the fall and either bag them or compost them. If you choose to compost, make sure they're good and decomposed before using the compost in your garden.
Happy gardening!

Friday, April 19, 2013

Flowers Anyone Can Grow

My garden is chugging along. The radishes have sprouted, the onions are putting out shoots, and my bugleweed (Ajuga reptans 'Purpurea') started blooming (and spreading) this week. The bugleweed came to me as a clump that some friends gave me out of their garden, and it seems to have established itself splendidly.

My bugleweed has little blue-purple flowers.
 Not only are the plants I planted doing well, but I also have some volunteers! My compost pile hasn't given me any compost yet, but it has a handsome tomato seedling growing out of the side.

A 6-in. tomato seedling is growing out of my
compost pile.

I have friends that keep insisting that they kill everything they try to grow. Well, I'm here to turn anyone who wants to be a gardener into a gardener. I posted last month on the 5 Things "Green Thumbs" Know, and went into more detail about how to put some magic in your dirt and how to plant a plant. I'll talk about how to water your plants soon, but I thought maybe my good readers would like a list of a few flowering plants that aren't too difficult to grow--to increase your chances of gardening success here in the hot, humid South.
.
Before you figure out which plants you can grow, the first question you need to answer is how much sunlight you have. There are roughly 3 categories: full sun, part sun, and full shade. Plants that prefer full sun need direct sunlight almost all day--8 hours or more. Plants that like part sun like to be shaded half the day--only like 4-6 hours of direct sunlight. Part sun areas also include areas that get light shade all of the day--like under a pine tree where plenty of sunlight comes through the trees. Plants that like full shade don't need any direct sunlight. If you look at the label on any plant at Home Depot or Lowe's, you'll see a little symbol that tells you how much sunlight that plant prefers. If you're at a local garden center, they don't always have those commercial labels, but the people who work there will be happy to tell you what the plants need.

The universal symbols for the sunlight needs of a plant.

Here in the South, those recommendations aren't set in stone. Sometimes plants that prefer full sun in cooler climates will benefit from afternoon shade here in the heat of summer. They won't bloom as much as they would in full sun, but they might survive July and August!

One more thing before you run out to your garden center--make sure to pick plants that look healthy and don't have too many flowers. While your instinct may tell you to pick the most beautiful plant, a plant with mostly buds and only 1 or 2 flowers will adjust better to its new home than one that's covered in blooms.

And now...drumroll please...The List:

Full Sun
Daylilies (Hemerocallis hybrids)*
Lantana (Lantana hybrids)
Knock Out roses (Rosa 'Knock Out')
Gardenia (Gardenia jasminoides)
Butterfly bush (Buddleia davidii)
Verbena (Verbena species and hybrids)
Annual vinca/Madagascar periwinkle (Catharanthus roseus)
Rosemary (Rosmarinus officinalis)
Gaura (Gaura lindheimerii)
Lily-of-the-Nile (Agapanthus species and hybrids)
Moss rose (Portulaca grandiflora)

Part sun
Everything in the full sun list can tolerate part sun, they just might not grow as big or bloom as much.
Hydrangea (Hydrangea macrophylla)
Camellia (Camellia japonica or Camellia sasanqua)
Azalea (Rhodendron hybrids)
Geranium (Pelargonium hybrids)
Begonia (Begonia hybrids)

Full shade
Plantain lily (Hosta hybrids)
Periwinkle (vine) (Vinca major or Vinca minor)
Bugleweed (Ajuga reptans)
Coral bells (Heuchera species and hybrids)

*The words in parantheses are the scientific name for the plant. Since common names can sometimes be confusing--a plant can have more than one common name, or two plants can have the same common name--the scientific name will help you know you're getting exactly what you're looking for.

Are you a novice gardener? Do you have any questions for me?

Sunday, March 24, 2013

Preparing Soil for Planting

We've had some crazy weather this past week, but spring is definitely here. My tulip bulbs emerged--I'm still waiting on blooms. Our cherry tree has put out a few blooms, but it looks like the cold snap has left it mostly covered in buds. Here's hoping it will be covered in flowers for Easter.

A sure sign of spring: my tulips are emerging.

In my last post, I mentioned how the magic for growing things is in the dirt. Well, this past week I worked a little magic in preparation for all the planting I am doing this spring. One bed was already there--we just removed the existing shrubs and improved the soil.  The other was an entirely new bed, but the process was basically the same for both.  I'll take you step by step through that process.

1. Break up the soil. I'm fortunate to have a husband who is good with a shovel. The soil in most of our yard is very compacted clay, so he alternated between a shovel and a pick mattock to loosen up the soil.


After that I came behind him with a little combo hoe and cultivator mattock. The sharp hoe side breaks up the smaller chunks of clay, and the cultivator side is great for stirring and fluffing. I kept going until the whole bed was tilled to a depth of 6 inches. I probably should have gone deeper, but that was all I had the energy for. Of course, if you have better soil than me, this whole step will take a lot less work.


2. Add compost. There are many different soil amendments available, but if you have to pick one, use compost.  If your soil is too sandy, you'll have to constantly pour water and fertilizer into it just to keep your plants alive. If your soil is heavy clay (like mine), your plants can drown or your roots can rot. Compost can improve any kind of soil--it adds drainage to clay soil, retains moisture in sandy soil, and adds nutrients to boost. I only started my compost bin last fall, so my pile is still cooking. Fortunately, you can buy compost at your local garden center. You'll want to add about one part compost for every one part soil. If you already have soil that's rich in organic matter and has the right balance of moisture, you'll need much less. If you have poor soil, you might want to add more.


3. Mix it up. After adding a few inches of compost, I took the cultivator side of my little hand tool and mixed it in thoroughly. After breaking up the soil previously, this step was pretty easy.


And that's pretty much it! Now you have a nice, healthy bed ready for planting. Depending on the size of your bed and the quality of your soil, you can knock it out in a couple of hours and reap the benefits for years.


Friday, October 26, 2012

Project #1: Compost Bin

When we moved to our new home, I imagined a beautiful vegetable garden enriched with compost for the biggest, healthiest vegetables. Any kind of soil you have can always be improved by adding organic matter. I figured if I got a compost bin in the summer, I could have enough compost for a small vegetable garden by next spring (it typically takes 6-12 months to make compost, if you work at it). Also, I liked the idea of finding a use for all those fruits and vegetables that go to waste when we don't eat them up fast enough. Well, we finally got around to building our compost bin a few weeks ago. I don't know how much compost we'll actually make in 6 months (especially since decomposition slows in cold weather), but we'll give it our best try.

Since we don't really own woodworking tools, I decided our best option was a nice, easy chicken wire bin. All we had to buy was a roll of chicken wire, 2 long, thin pieces of wood for posts (they cut them in half for us at Home Depot), and some wire. I think it cost us $20-30 all together. It's not the most beautiful bin ever, but it's functional. It took less than an hour to build with my husband and I working on it together. Since I think the last thing I built was a soapbox derby car with my dad when I was 10, I'm pretty proud of it. I found the directions at the University of Missouri Extension website.

A good compost pile should be half "brown matter" (like dry leaves and small sticks) and half "green matter" (like grass cuttings and vegetable scraps). I have plenty of leaves in my yard, but I'm a little low on green matter, so we're building our compost pile slowly.